 May the Force Brie With
You :
May the Force Brie With
You :
A step-by-step guide to
brie cheese,
courtesy of
Trumansburg Middle School
& Master Yoda
By Elizabeth Goodwin
 The best cheese begins with the
best quality milk. At 8:20 AM, the magic began…the Brie
The best cheese begins with the
best quality milk. At 8:20 AM, the magic began…the Brie
Boys (left to right: Jaden S. and Evan B.) poured
Ithaca Milk into the cheese vat.
“Ready
are you?...A Jedi must have the deepest commitment, the most serious mind.”

The Brie Boys turned on the
burner, and monitored the milk as it heated to 90˚F. For 2 gallons of milk, this takes 15-20 minutes. It is important to heat the milk gently and
slowly, to avoid solids sticking to the bottom of the pan and burning.
“Patience
you must have, my young padawan.”
 Once the milk has reached the
desired temperature, turn off the burner
completely. It is time to add the
cultures – C 101, Geotrichum C7, and P. candidum. (Unfortunately, we forgot to take pictures of
this step. So, this is a picture of the culture packets on the table).
Once the milk has reached the
desired temperature, turn off the burner
completely. It is time to add the
cultures – C 101, Geotrichum C7, and P. candidum. (Unfortunately, we forgot to take pictures of
this step. So, this is a picture of the culture packets on the table).
“Feel
the force!”
 Next, to make the potion
complete, add calcium chloride. Any
milk that has been pasteurized and cold-stored should have CaCl added to it. It
is sometimes recommended when using raw milk, as well. (We also did not take
pictures of this step, so Evan is pictured here acting it out post-fact. In
reality the CaCl was carefully measured out J).
Next, to make the potion
complete, add calcium chloride. Any
milk that has been pasteurized and cold-stored should have CaCl added to it. It
is sometimes recommended when using raw milk, as well. (We also did not take
pictures of this step, so Evan is pictured here acting it out post-fact. In
reality the CaCl was carefully measured out J).
Stir
in additions gently and thoroughly!
“You
will find only what you bring in.”
While
maintaining the temperature at 90˚F, let the milk rest for 30 minutes. We were able to do this by
simply putting a cover on the pot. If you notice the temperature dropping,
perhaps try wrapping the pot with towels. Because brie uses a mesophilic
starter, it would be better for the milk
temperature to drop a bit than get too warm, so we don’t advise turning on
the burner. 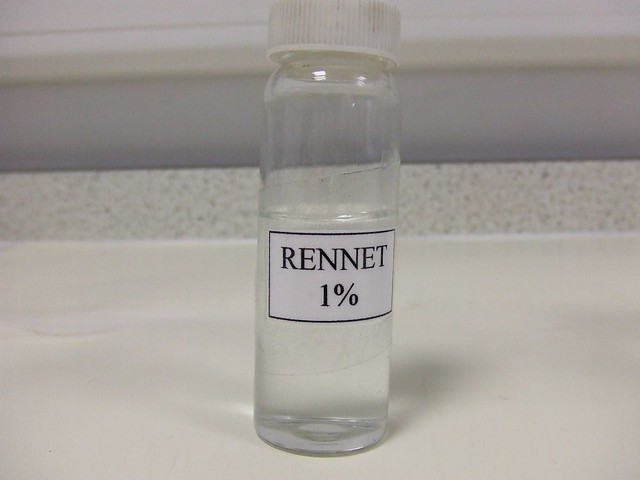 When
the timer goes off (we hope you are using a timer), add the rennet, stirring it into the milk gently for 1 minute. Now
find something to do (sanitize equipment?), because you must put the lid back on
and let the milk rest for 90 minutes.
When
the timer goes off (we hope you are using a timer), add the rennet, stirring it into the milk gently for 1 minute. Now
find something to do (sanitize equipment?), because you must put the lid back on
and let the milk rest for 90 minutes.
“Difficult to see. Always
in motion the future is.”
As Master Yoda
promised, our patience serves us…behold! A firm
 curd mass! This is where the
real fun begins. It is time to transfer
the curd into the prepared mould(s). The mould should be sitting on a
draining mat. We set up our mould + draining mat on a drying rack inside a
large plastic tub, to contain the whey. (It sounds complicated, but it’s not).
curd mass! This is where the
real fun begins. It is time to transfer
the curd into the prepared mould(s). The mould should be sitting on a
draining mat. We set up our mould + draining mat on a drying rack inside a
large plastic tub, to contain the whey. (It sounds complicated, but it’s not).


If all the curd
does not fit when the mold(s) is full, simply wait and the curd will settle.
Then add the rest. (This is also a reason to have more than one mold on hand).
For many more
pictures of this process, flip to the last page.
“Mudhole?
Slimy? My home this is!”
Allow the curds to
settle at ambient temperature 68-74˚F
(we figured room temperature on a warm, sunny day would do the trick).
 | |||
|
| We were able to confidently slide our cheeses out of their moulds and turn them after they had been left to drain overnight. |
“Do
or not do. There is no try.”


“Much to learn you still have, my old padawan.
This is just the beginning!


Turning the cheese…
“The future of all Jedi uncertain
is. Move forward cautiously we must.”


During the next 18-24 hours (Draining
Day 1), the cheese will drain down to about
⅓ of the original curd height.
Flip the young cheese several
times during this time.
“If no mistake you have made,
losing you are. A different game you should play.”
At this point, much has been
accomplished. But this is not the end. Stay tuned for the next installment of
“May the Force Brie With You” …
Draining
Day 2 and Storage

